
Lecture 3: The History of Tents for Ultralight Hikers
Text: Seimi Rin
Photos: Masaaki Mita
Lecture 3: The History of Tents for Ultralight Hikers
Text: Seimi Rin
Photos: Masaaki Mita
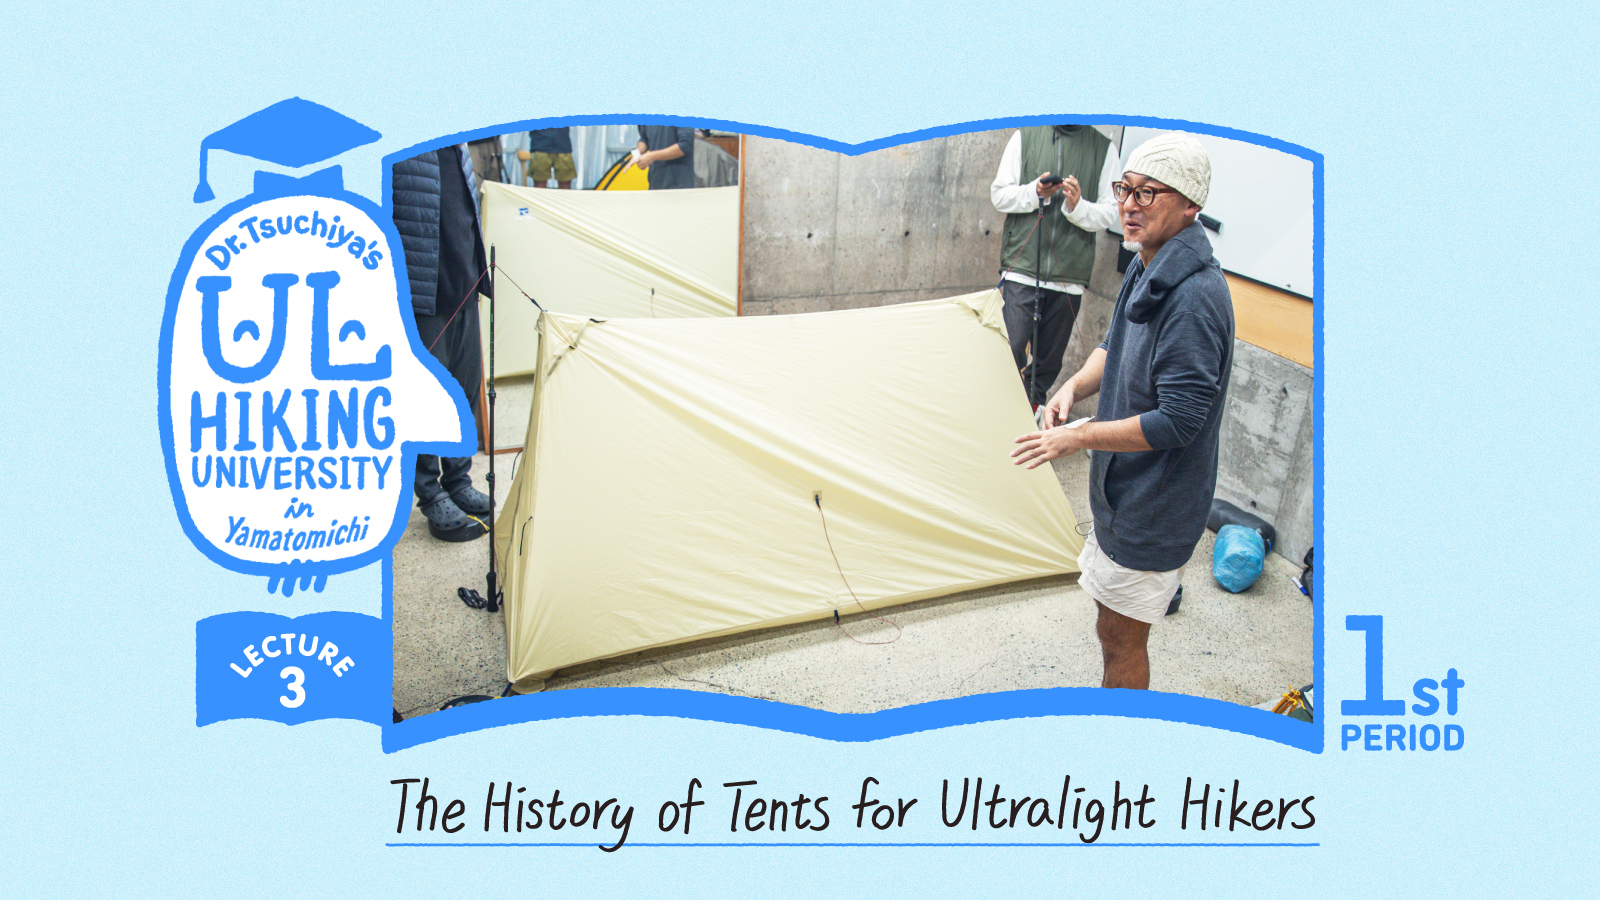
Tomoyoshi Tsuchiya, owner of Hiker’s Depot in Tokyo and one of Japan’s ultralight hiking pioneers, is the author of Ultralight Hiking (2011) and a frequent Yamatomichi collaborator. Every few months, Tsuchiya hosts a lecture at Yamatomichi’s Laboratory, in Kamakura, covering the history of ultralight hiking and the evolution of its practitioners’ gear, from packs and tents to shoes and sleeping bags. In past lectures, he's covered ultralight hiking backpacks and footwear. In this third lecture series, he's leading us on a journey into the world of mountaineering tents. This period, Tsuchiya looks at the evolution of dome tents, the problems caused by condensation and the shifting landscape of modern tent design. He also delves into the fundamentals of setting up tarps and shelters. Beware readers: you may need to rethink your assumptions and preconceptions about tents.
Dome tent beginnings: single-wall construction
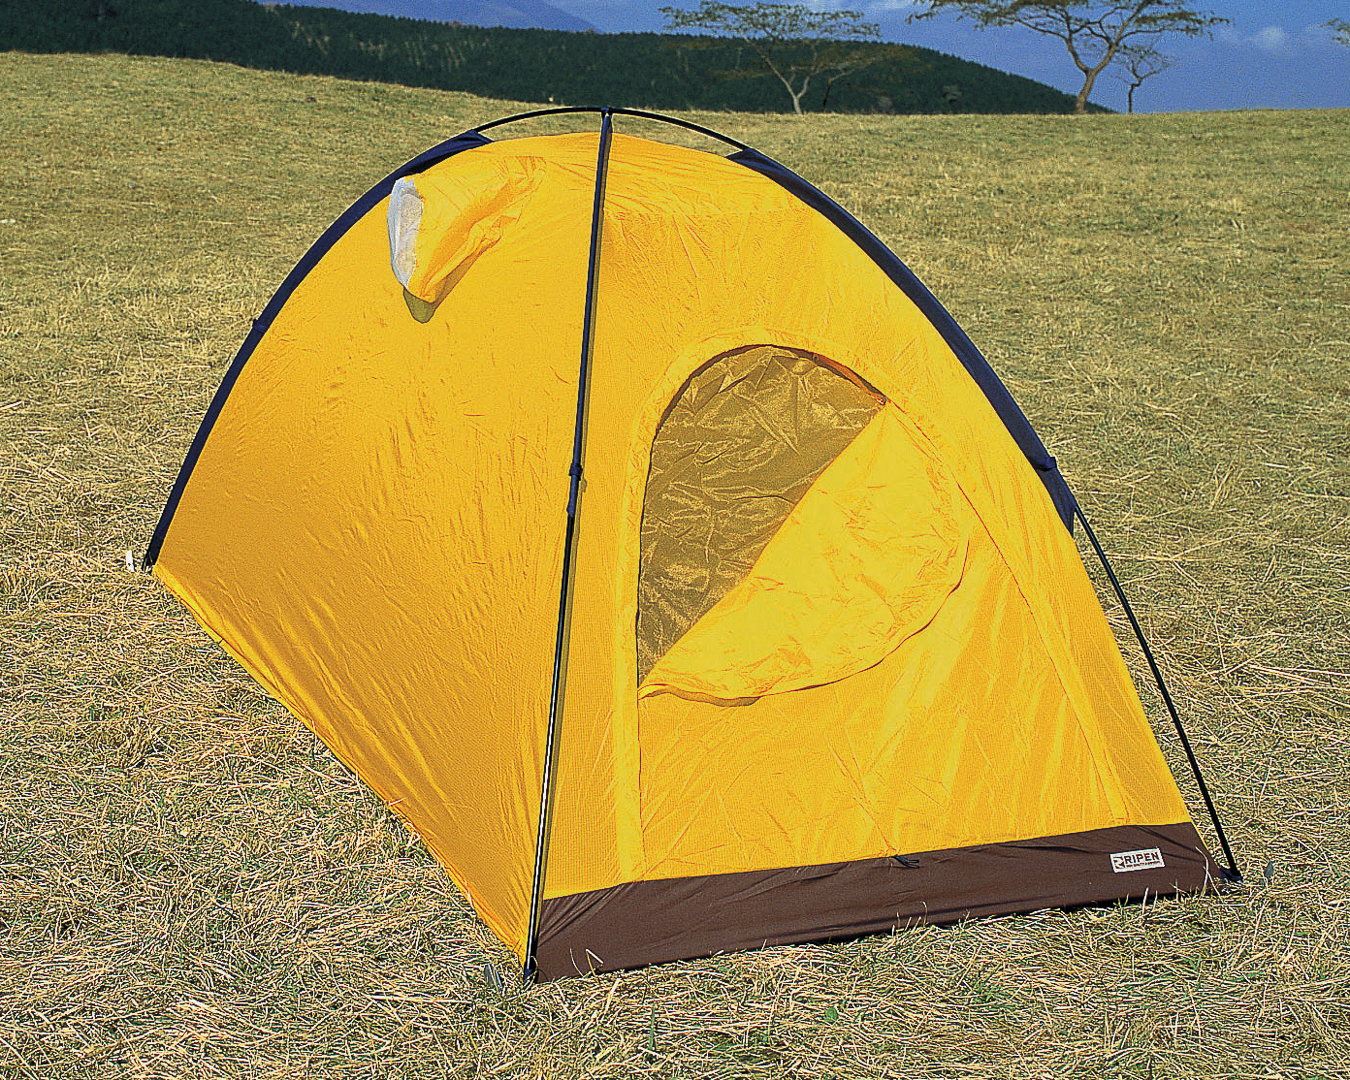
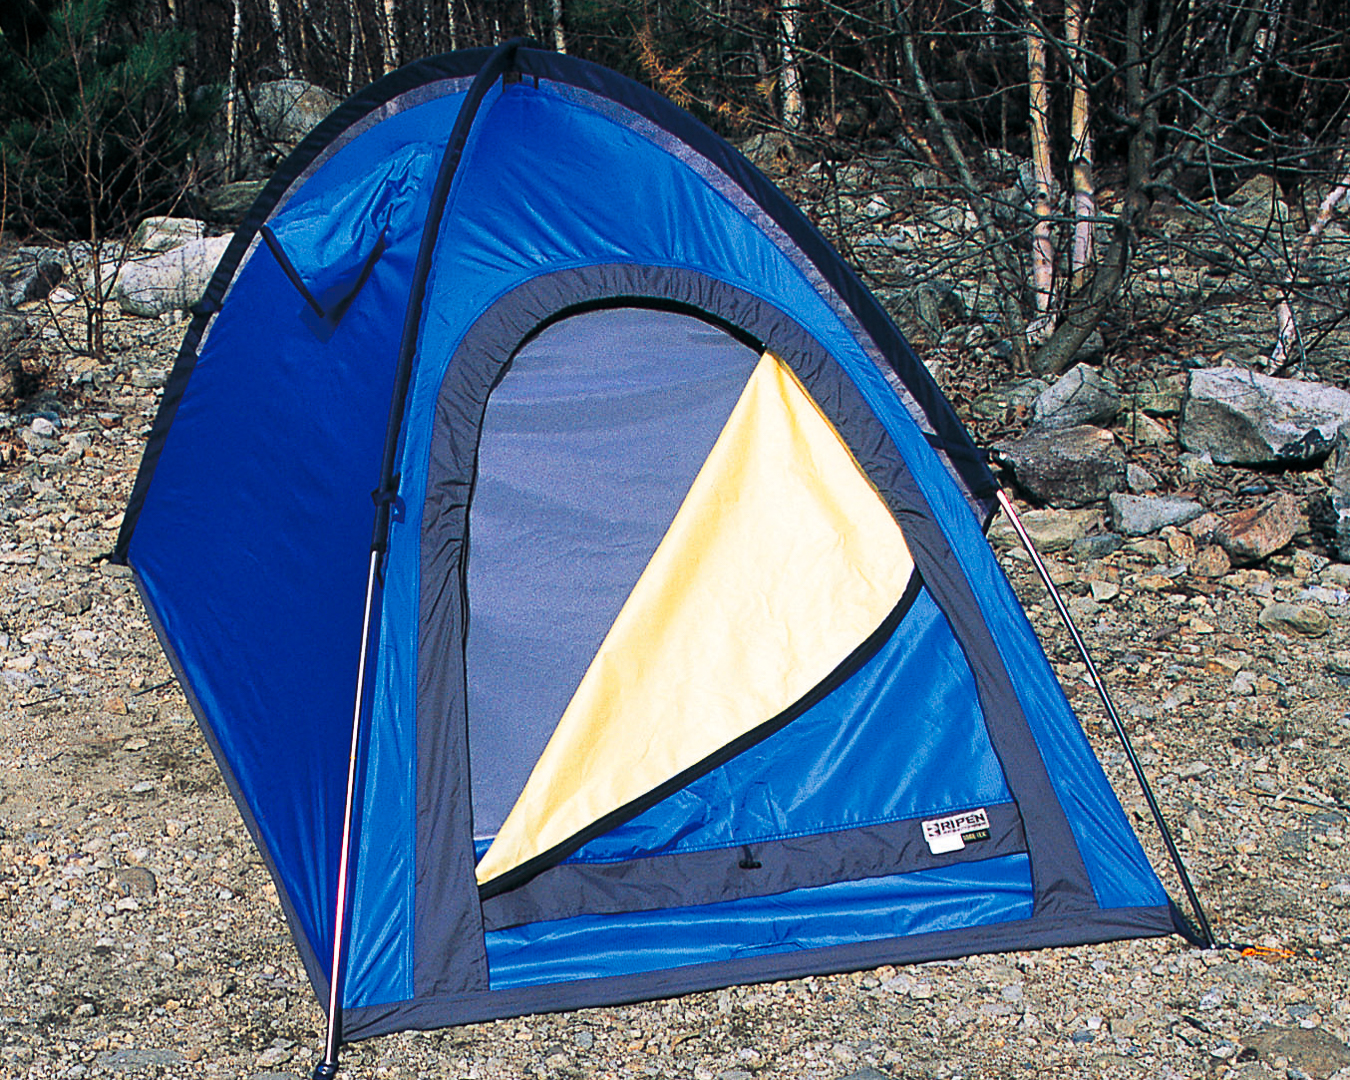
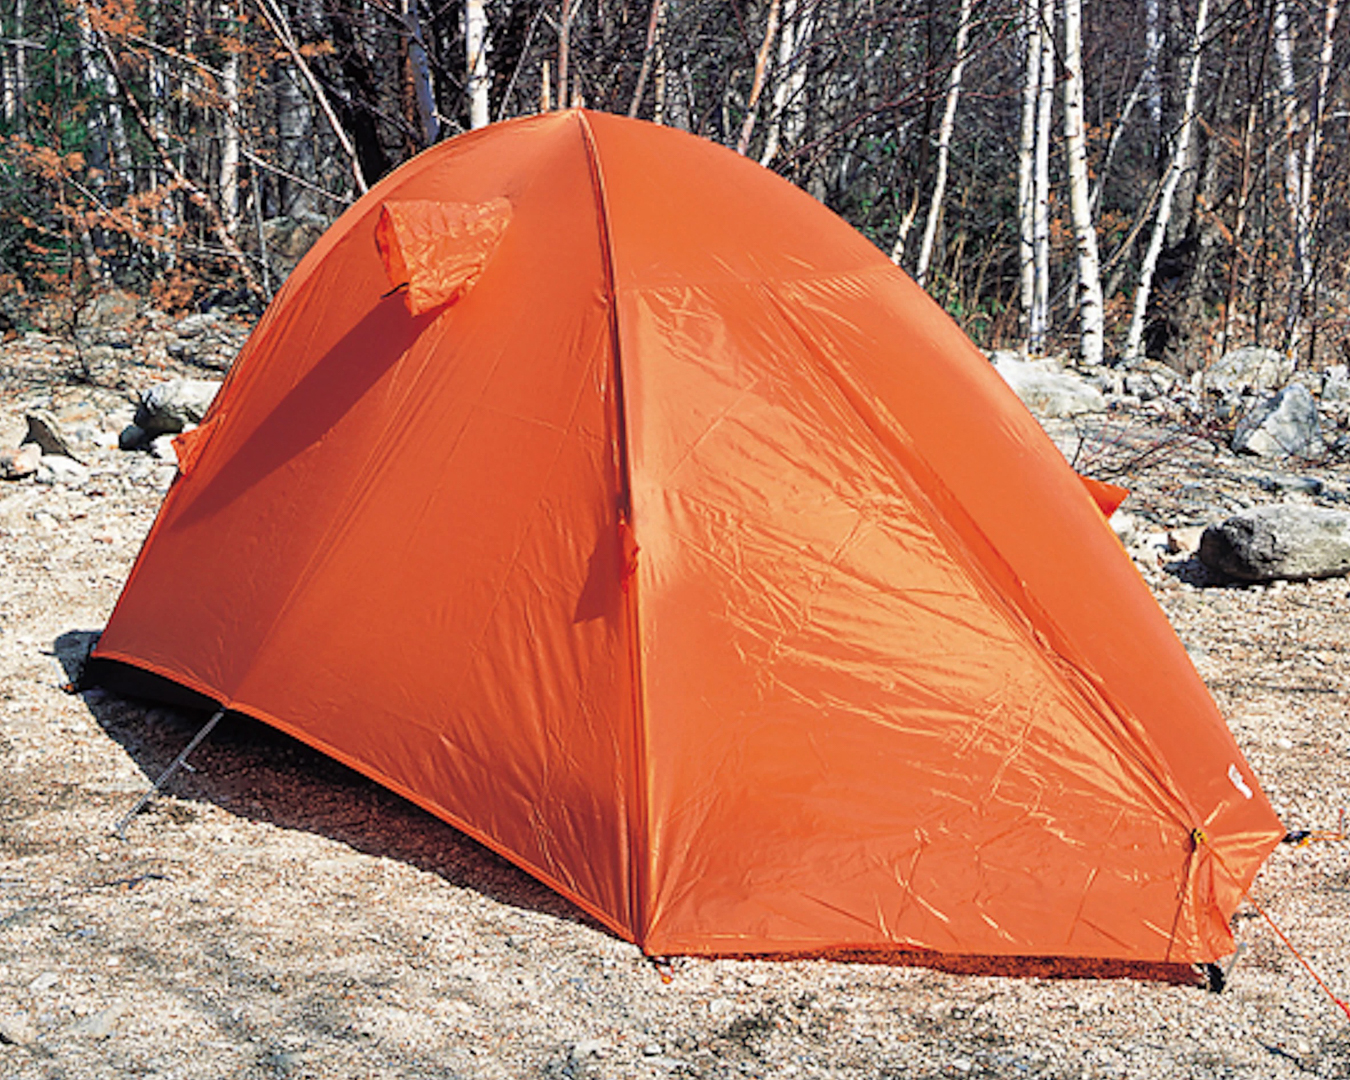
In the first period, we started off with tarps and made it to freestanding dome tents. In Japan, manufacturers began producing freestanding dome tents in the 1970s. These days, many hikers think of a tent as a one-person shelter. The coronavirus probably had something to do with that.
In 1986, a decade and a half after the first dome tent was sold in Japan, Arai Tent released its first solo tent model. Solo tents had been around before but they weren’t mainstream. And it wasn’t until this time that solo tents weighing less than 1.5 kg entered the market.

Tomoyoshi Tsuchiya –– owner of Hiker’s Depot in Tokyo, author of Ultralight Hiking (2011), Japanese ultralight hiking pioneer –– speaks with Yamatomichi staff at the Yamatomichi Laboratory In Kamakura, Kanagawa prefecture.
Arai Tent’s lineup featured the Raiz 1, released in 1984, the Gore Raiz, released in 1985, and the Air Raiz, which went on sale in 1986. The Rise 1 and Gore Raiz were single-wall tents. Gore Raiz got its name from its GORE-TEX fabric. The Air Raiz, still one of Arai Tent’s flagship products, is a double-wall tent.
Arai Tent’s Raiz 1 solo tent(Photo credit:Arai Tent)
Arai Tent’s Gore Raiz 1 was made of a Gore-Tex fabric (later models, such as the E Raiz, used different materials).(Photo credit: Arai Tent)
The double-wall Air Raiz is Arai Tent’s flagship model. (Photo credit: Arai Tent)
The key point here is that, while double-wall tents are widely considered the standard now, and single-wall tents are often seen as a simplified version with fewer parts, it all started with single-wall tents, as Arai Tent’s history shows.
Solo tents were designed to be lightweight. Winter tents have external covers, but they were originally conceived of as single-wall designs. To improve breathability, GORE-TEX was introduced.
Later, tent makers tackled condensation problems by using thinner fabrics and a double-layer construction. This is true of the Air Raiz –– a double-wall tent that weighs almost the same as a single-wall tent –– whose evolution had an impact on mountaineering tents in Japan.
Overblown worries about tent condensation
Let’s talk about condensation. Think about how windows in a house fog up in winter. In Hokkaido (Japan’s northernmost prefecture), windows are usually double-paned for insulation –– or covered with thick curtains. Even if the window is covered in condensation, by closing the curtain it becomes no longer visible to you. The wetness might as well no longer be there. This can feel reassuring.
It’s the same for double-wall tents. At stores, people often ask: “Which tent doesn’t get condensation?” In my opinion, everyone worries about condensation too much. Even with a double-wall tent, condensation will form on the inside of the rainfly. But because there’s an inner layer between you and the rainfly, you don’t see the condensation; it doesn’t bother you. The inner tent is functional: It prevents condensation from dripping onto you when the wind blows –– which is one advantage but that doesn’t mean it isn’t there.
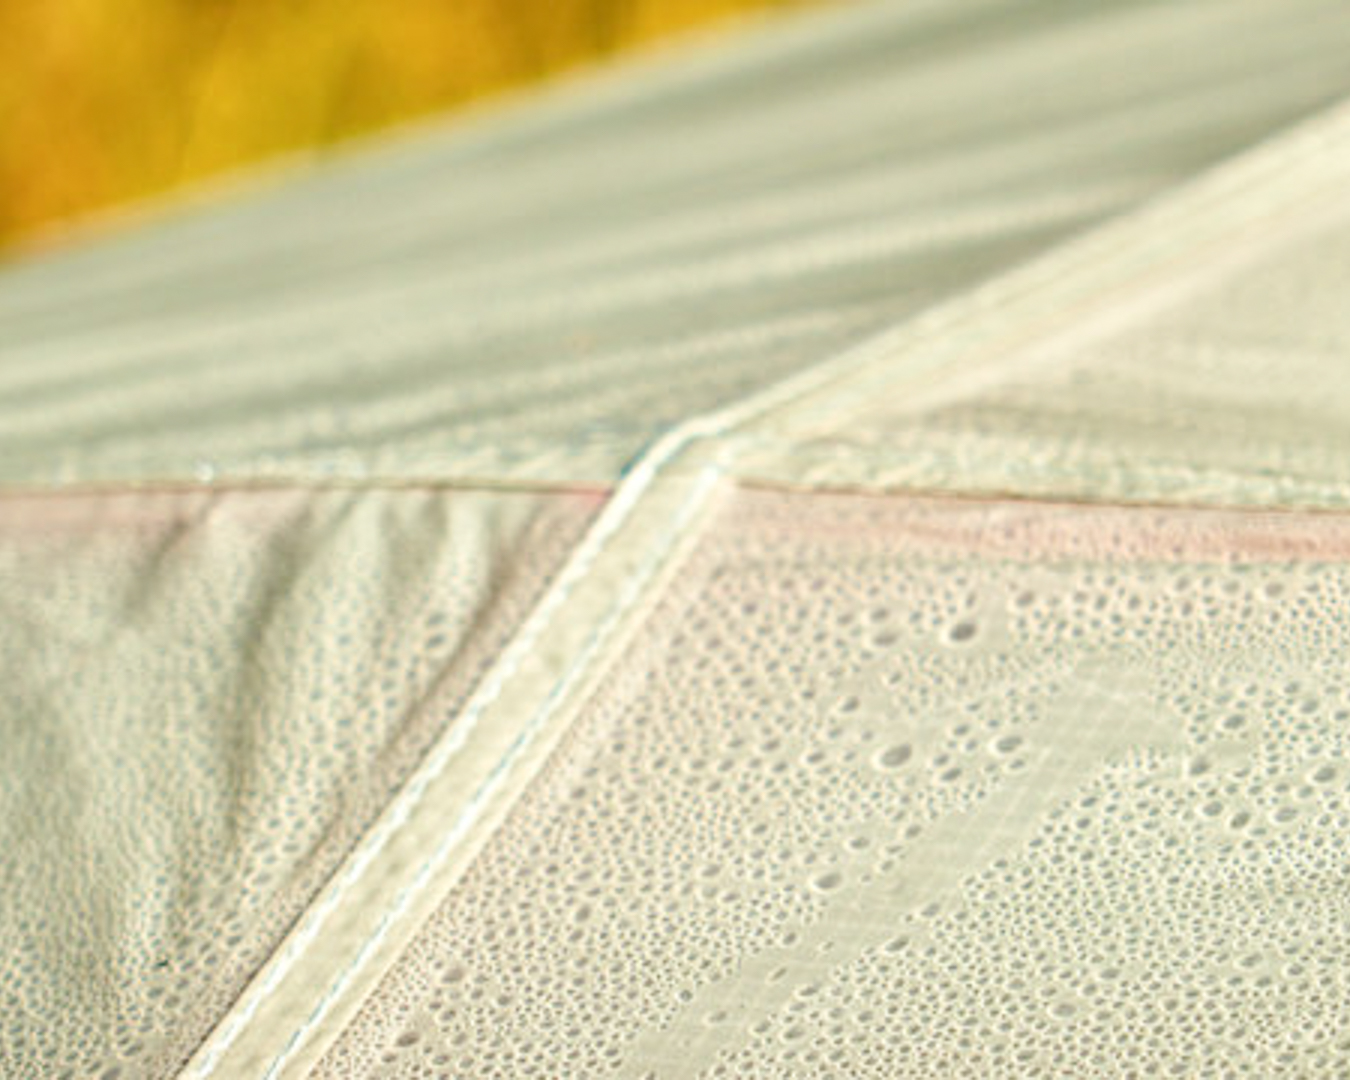
Condensation forms on the inside of the rainfly, even with a double-wall tent.
Condensation doesn’t just go away, so the basic approach to managing it in a tent is to not let it get to you –– physically and mentally. It’s an unavoidable natural phenomenon. Of course, it’s not as if I can’t sympathize with people who are bothered by it.
Mountaineering styles and changing tent shapes
Tent size has changed with mountaineering trends. This is true for the shift from large, self-supporting dome tents for groups to smaller dome tents for one or two people.
Since personal dome tents appeared nearly 40 years ago, solo hiking has become increasingly popular in Japan –– and especially in the past 15 years. In the aftermath of the coronavirus pandemic, solo hiking has become the norm. As a result, tent designs are likely to continue diversifying.
For ultralight hiking and long-distance hiking, carrying a solo tent has become part of the culture, except, of course, if you’re traveling as a couple. But it’s important for shop staff and manufacturers to keep in mind how we got here. We can learn from tent designs of the past, even though there is a clear difference between a solo tent and a tent that accommodates several people.
With the rise of ultralight hiking, mountaineering gear has, in some ways, become simpler. It’s gone back to its roots. There’s been a move toward gear with a stripped-down design, which has made it easier for anyone to create their own and has has sparked renewed interest in DIY gear and custom-made gear. This is already happening in the ultralight hiking scene.
A one-pole shelter by Yuichi Ohashi, who took part in the MYOG workshop hosted by Yamatomichi HLC North Kanto. Nowadays, such DIY gear is gaining popularity.
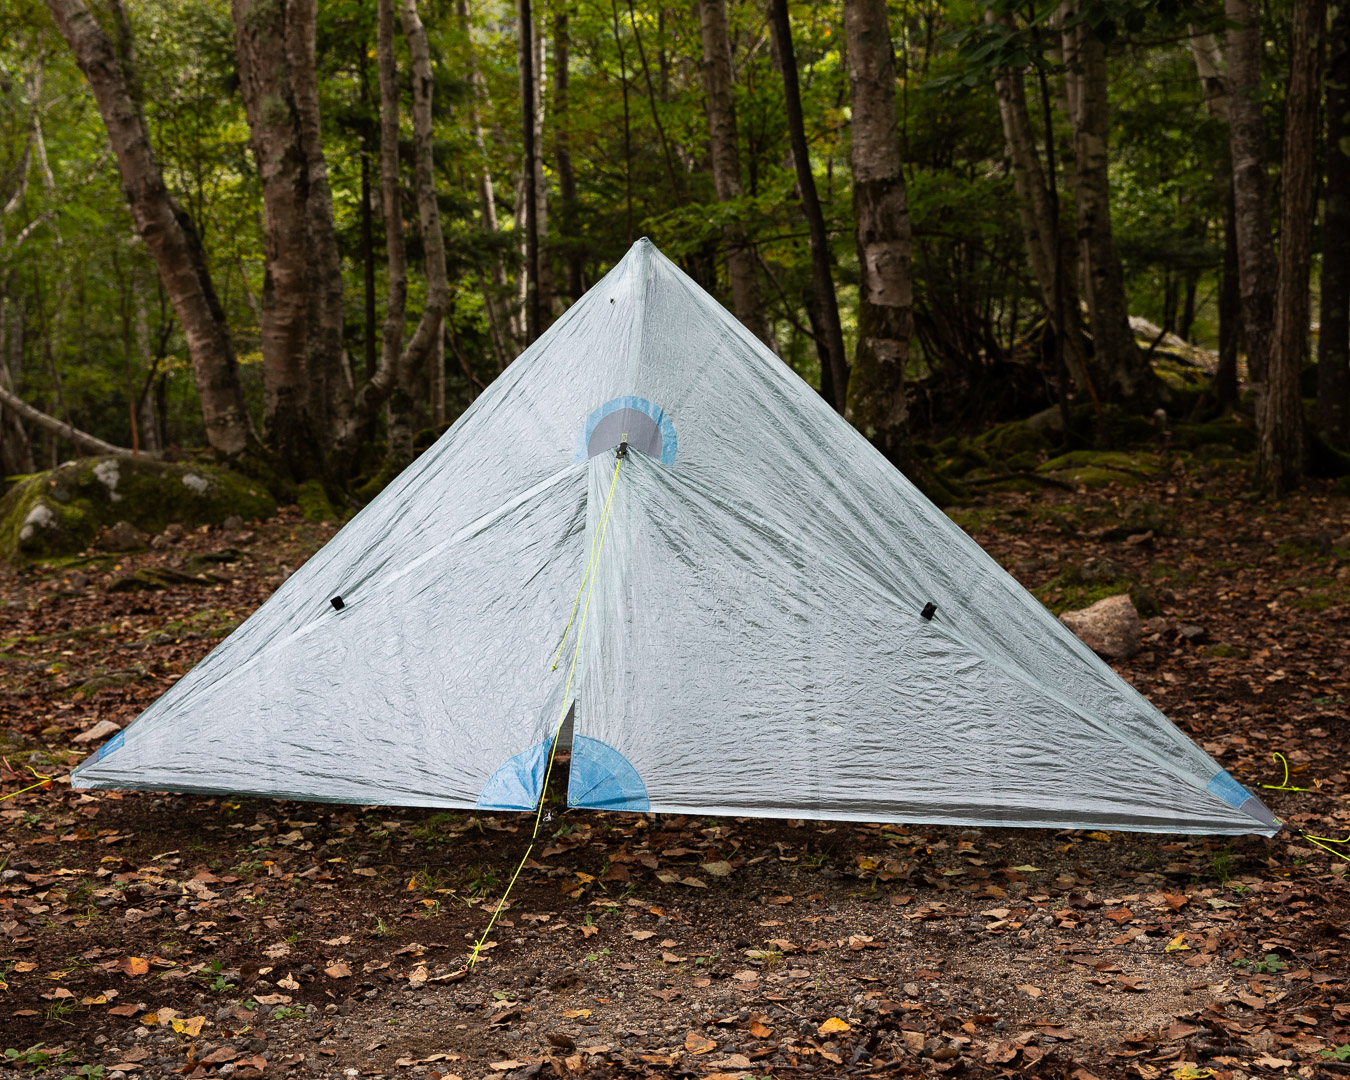
Setup basics: non-freestanding shelters and tarps
We’ve rushed through some things, but let’s wrap up the history of tents and move on to the basics of setting up non-freestanding shelters and tarps.
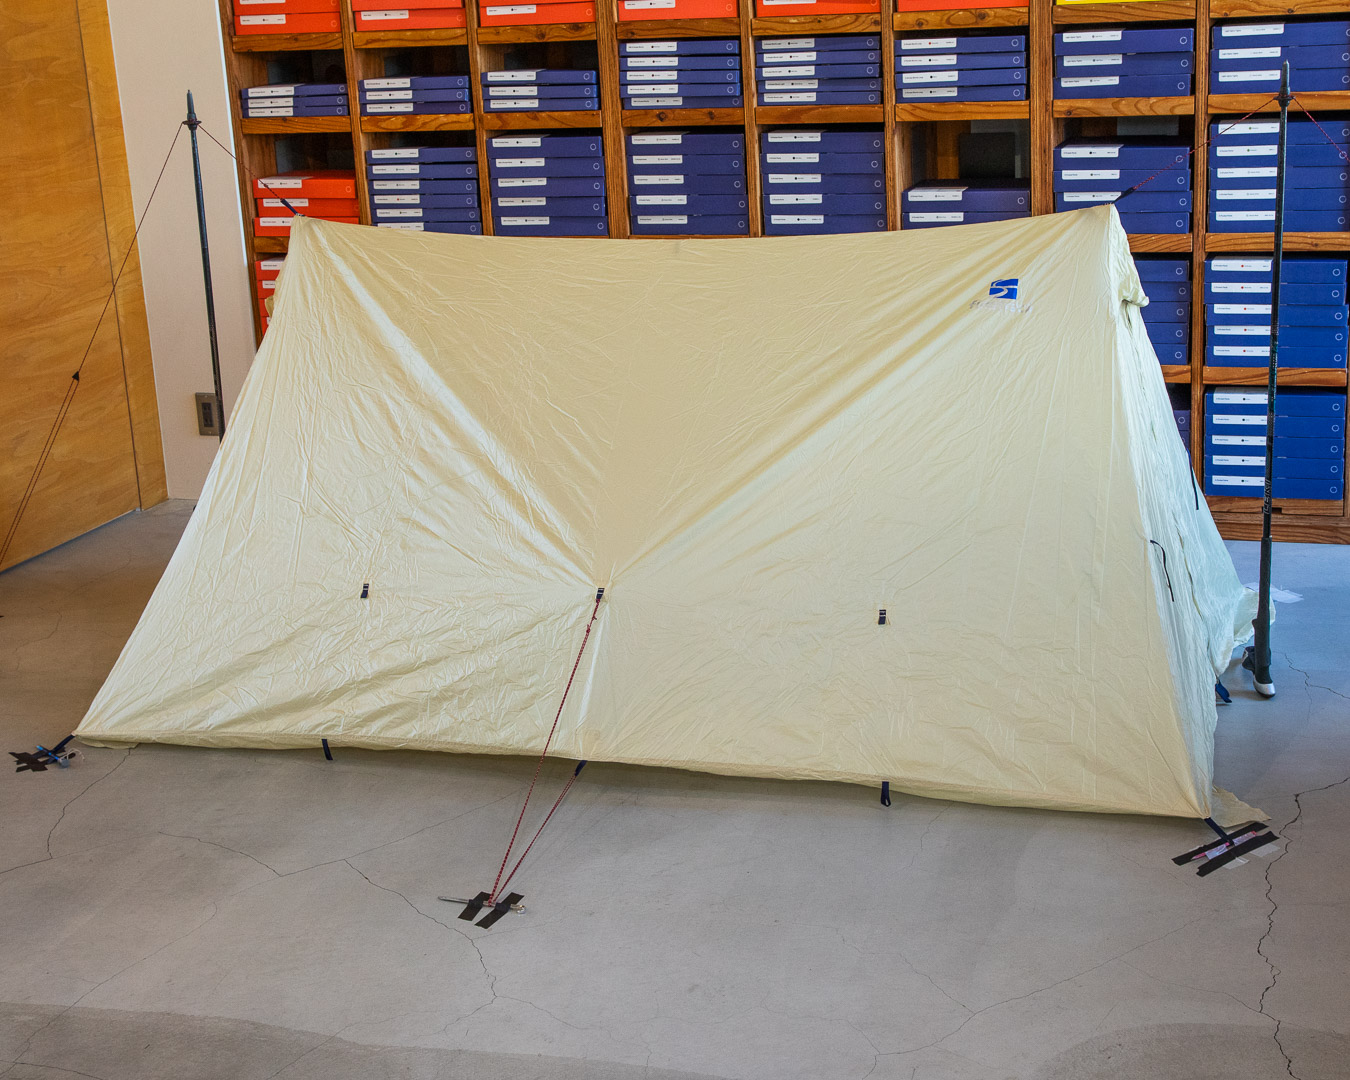
When setting up a tarp or a non-freestanding shelter, many people worry about whether they can properly pitch the poles. The key point to keep in mind: create a triangle. This goes for both tarps and shelters.
Let’s use a tarp as an example.
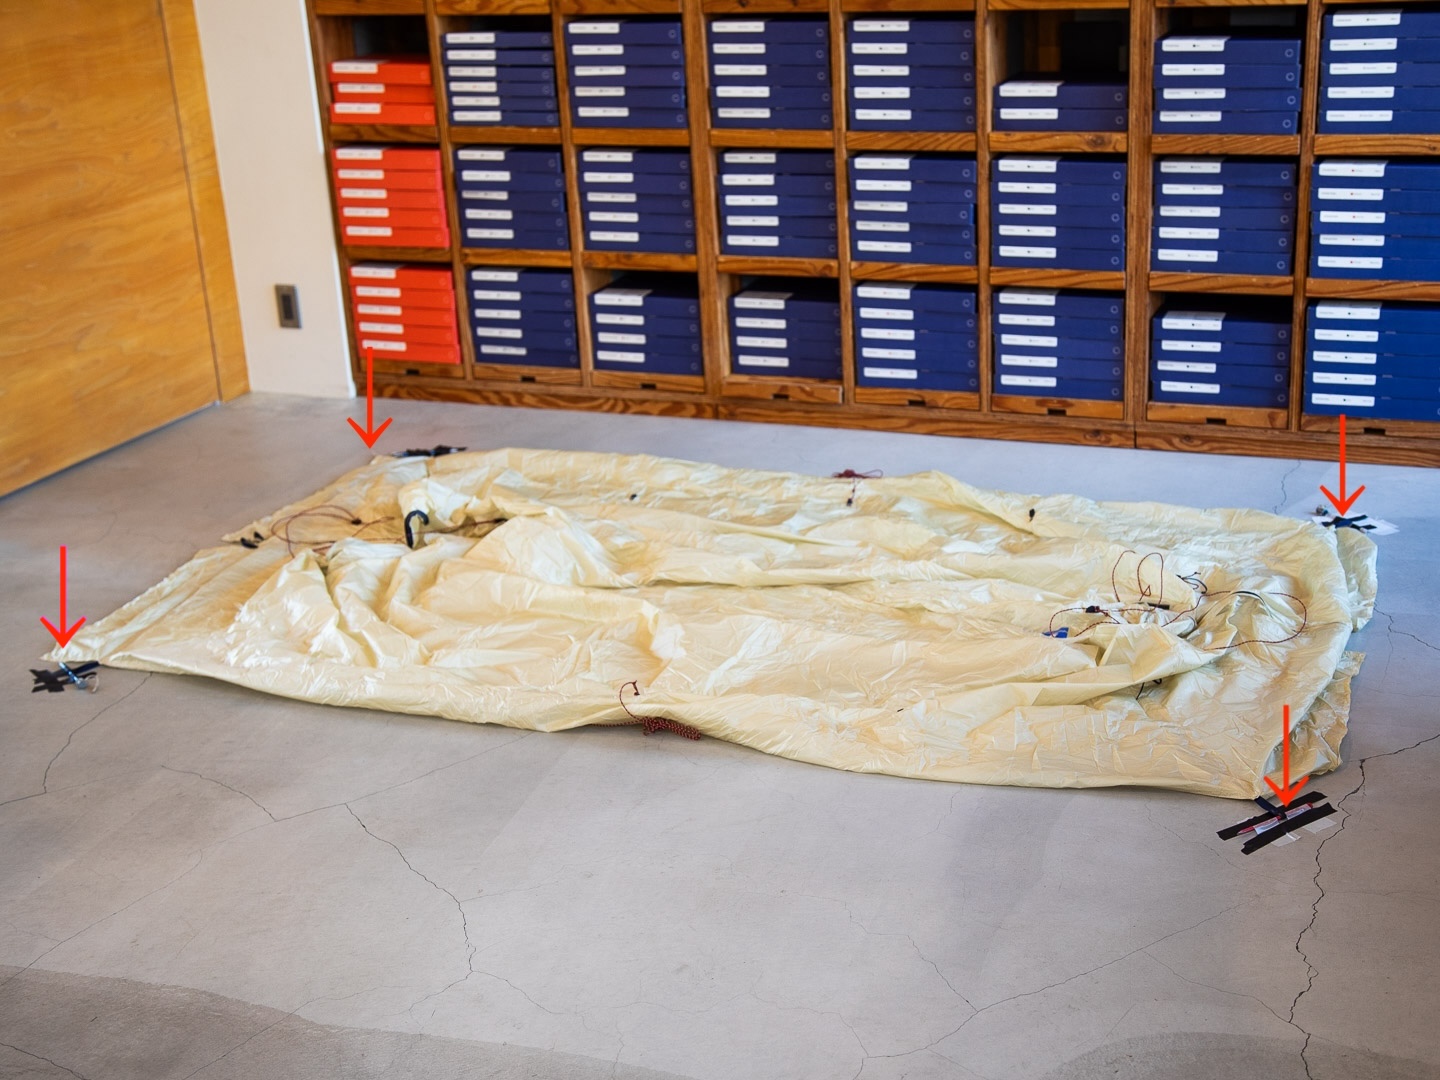
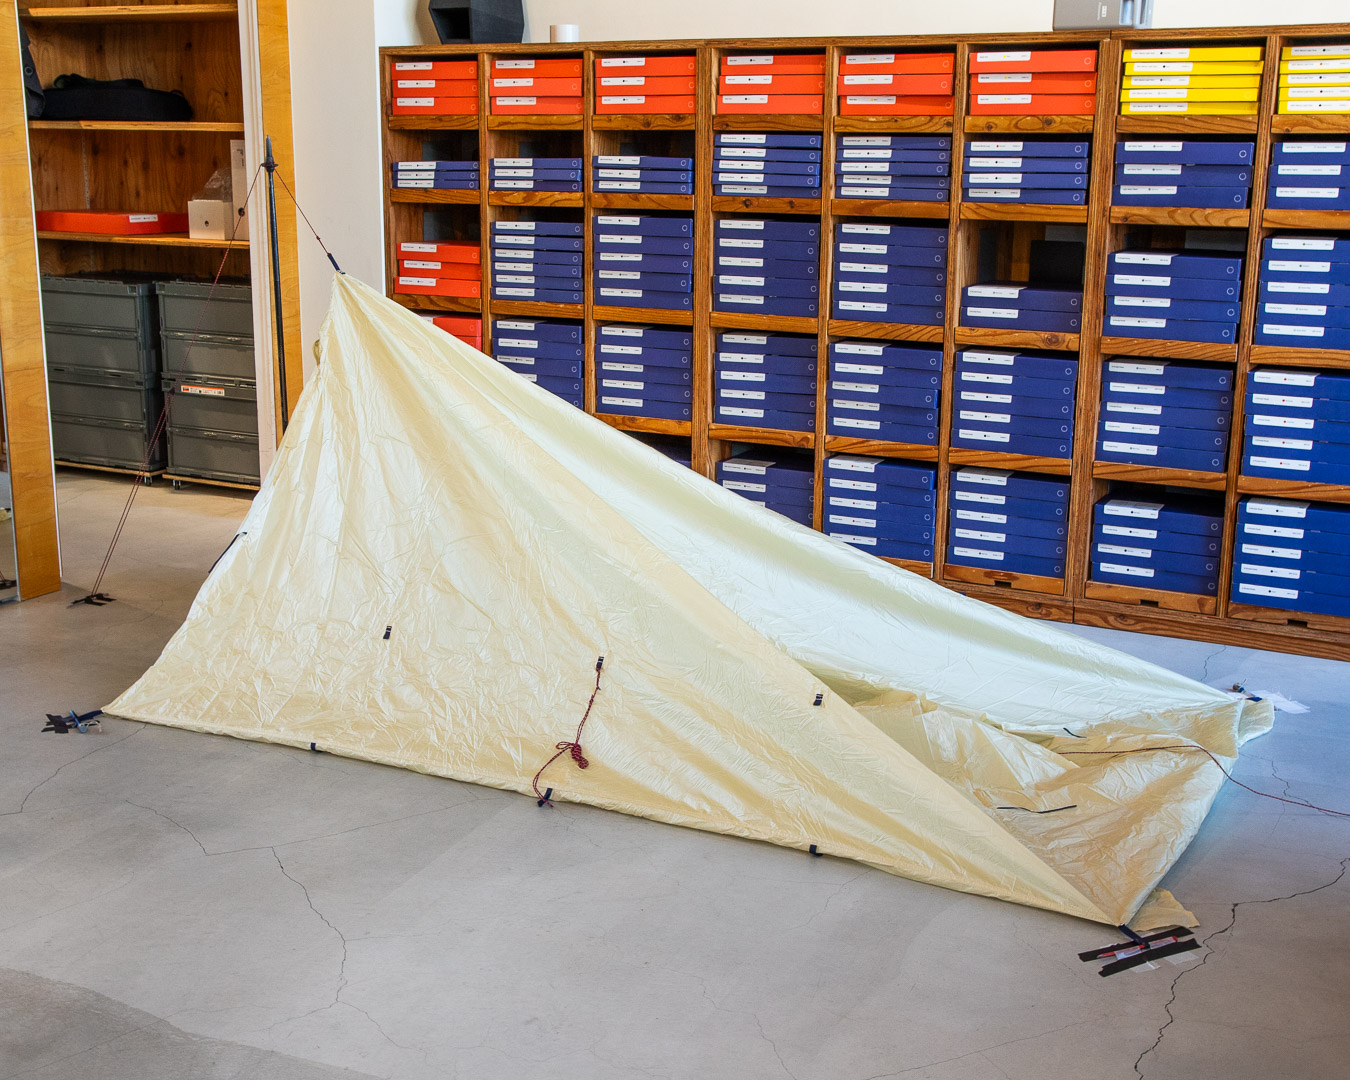
First, peg both corners of the tarp’s edge that’s opposite the side where the pole will go.
Attach a guyline to the center loop of the edge closest to the pole. Hook the pole into place, and peg the line to the ground. The triangle –– tarp centerline to pole to ground –– you’ve formed will keep the pole standing.
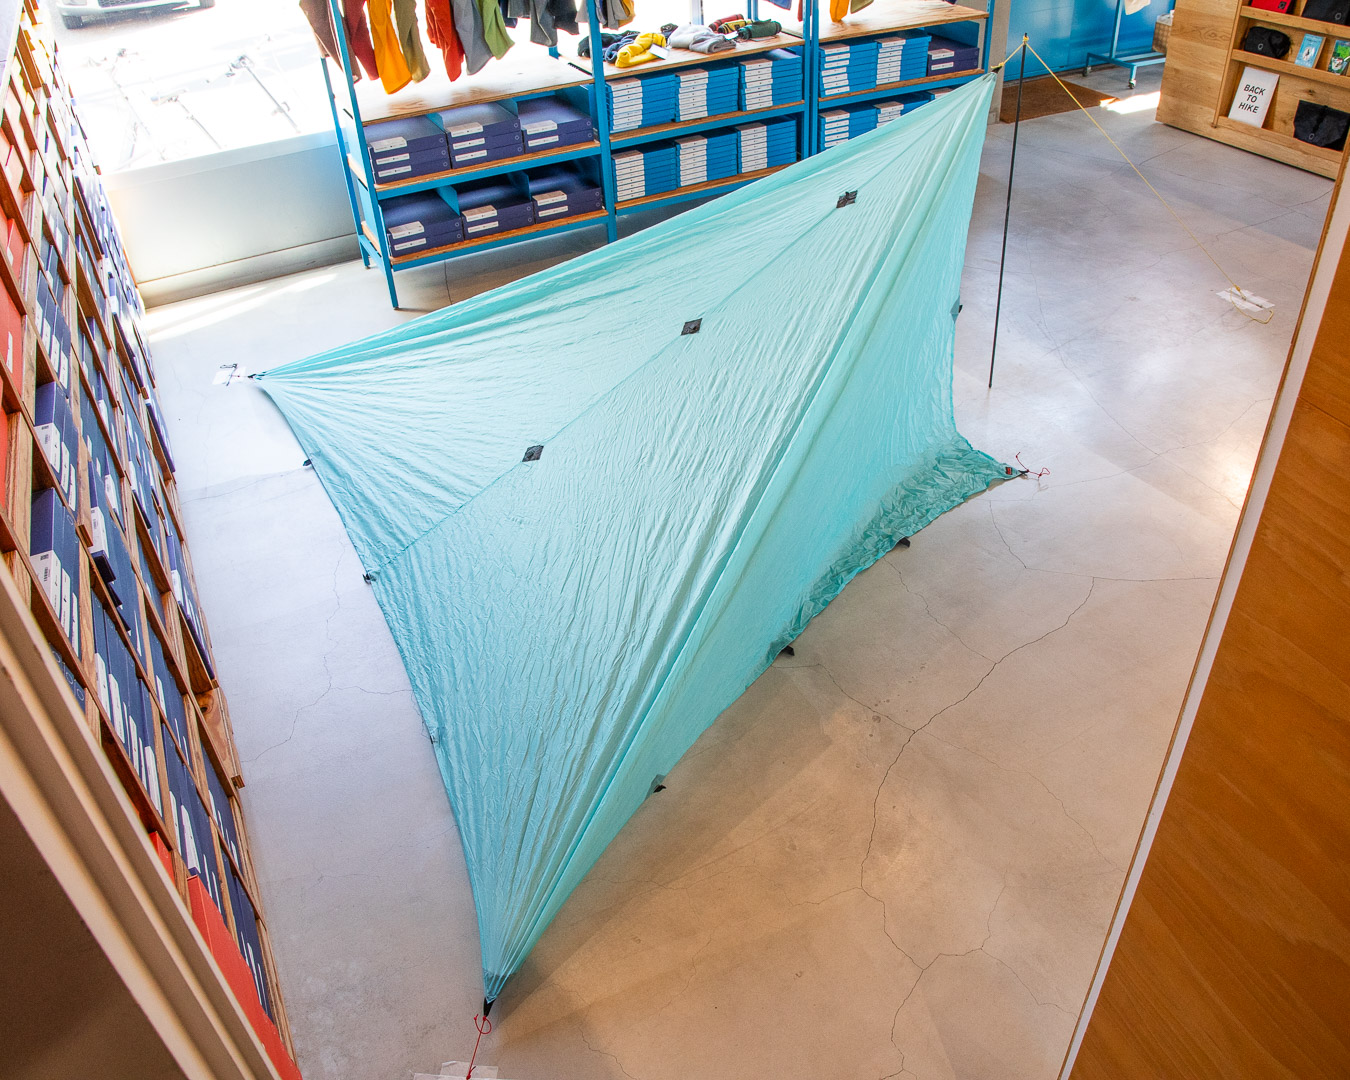
Step 1: Peg down both ends of the edge opposite to side where the pole will go. Then, attach a guyline running from the center of the tarp to the pole and peg down the end of the guyline. The guyline should run diagonally from the pole to the ground. The triangle –– tarp centerline to pole to ground -– you’ve formed will keep the pole standing.

Ideally, the standing pole will be at the center of the triangle, but it doesn’t have to be exact. The pole will remain relatively stable, as long as it is within the triangle.
Once the pole is standing, secure the remaining two corners of the tarp. This completes the setup.
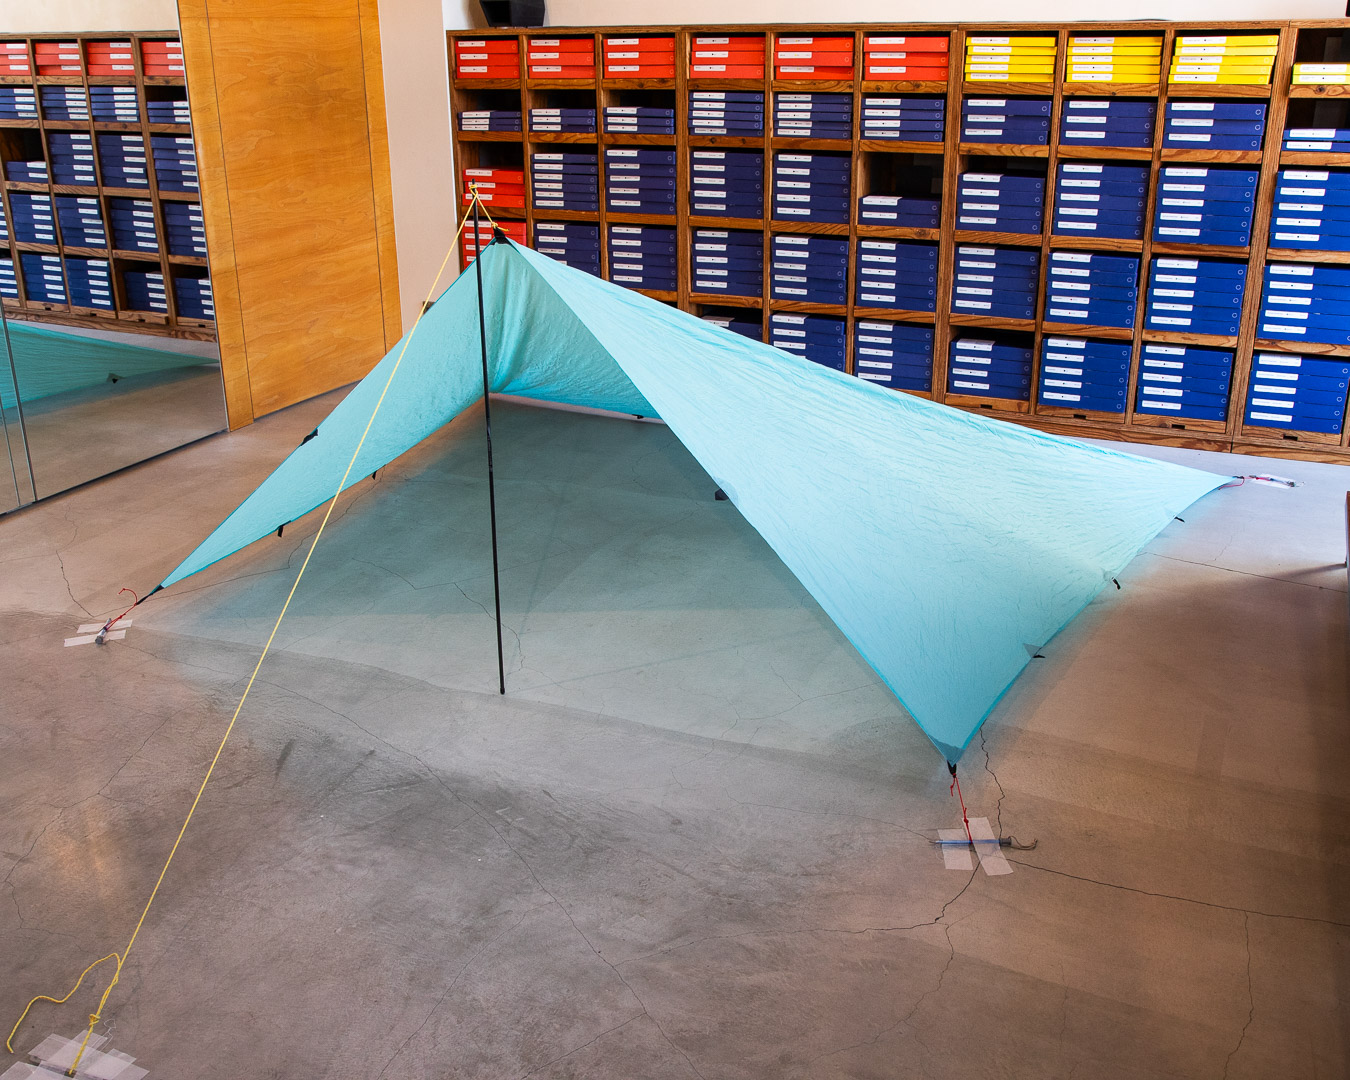
Basic single-pole tarp setup
When it comes to non-freestanding, single-pole shelters, it helps to think about a triangle structure. This will make the setup easier and is especially true for models that have a hexagonal floor or uneven skirt lengths. You won’t need to worry about precise angles at each vertex for stability.
For a single-pole structure with a hexagonal floor, let’s look at the diagram (below, left). Start by pegging down two points on either side of where you’ll have your entrance. Insert the pole and stand it up inside. Next, peg down the point along the centerline and one the opposite side from your entrance (the bottom of the inverted triangle, in the diagram below). This forms a stable triangular structure and allows the pole to stand on its own. Peg down the remaining corners to secure the shelter.
For pyramid-shaped shelters with square floors (see the diagram below, right), you will want to anchor all four corners tightly first, before inserting the pole to raise the shelter.
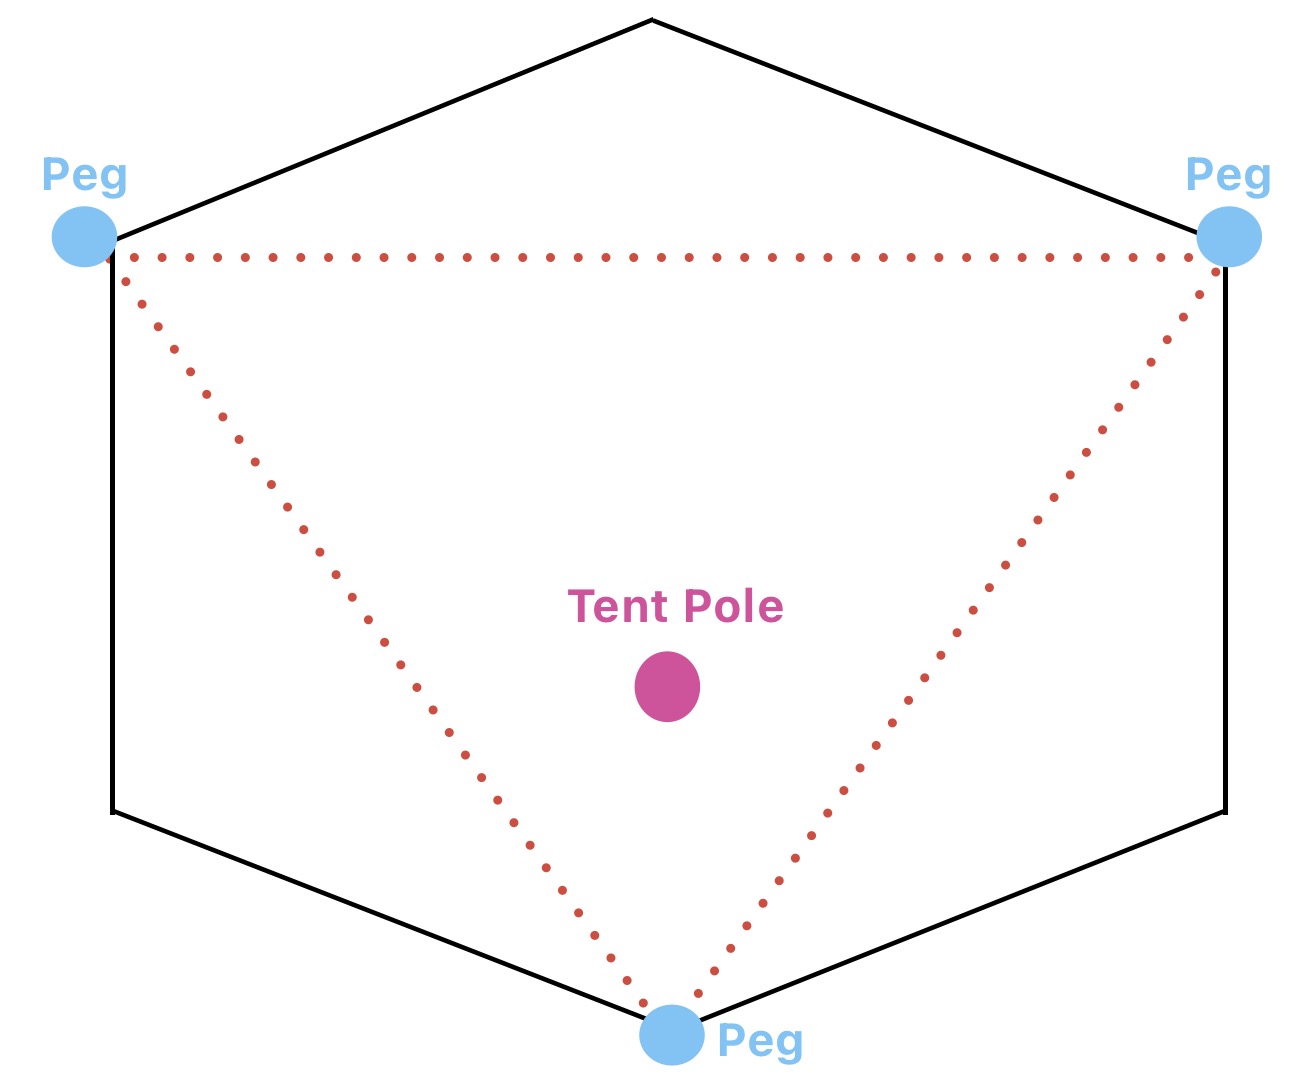
For hexagonal shelters, think about forming a triangle with three points. This allows for a quicker setup.
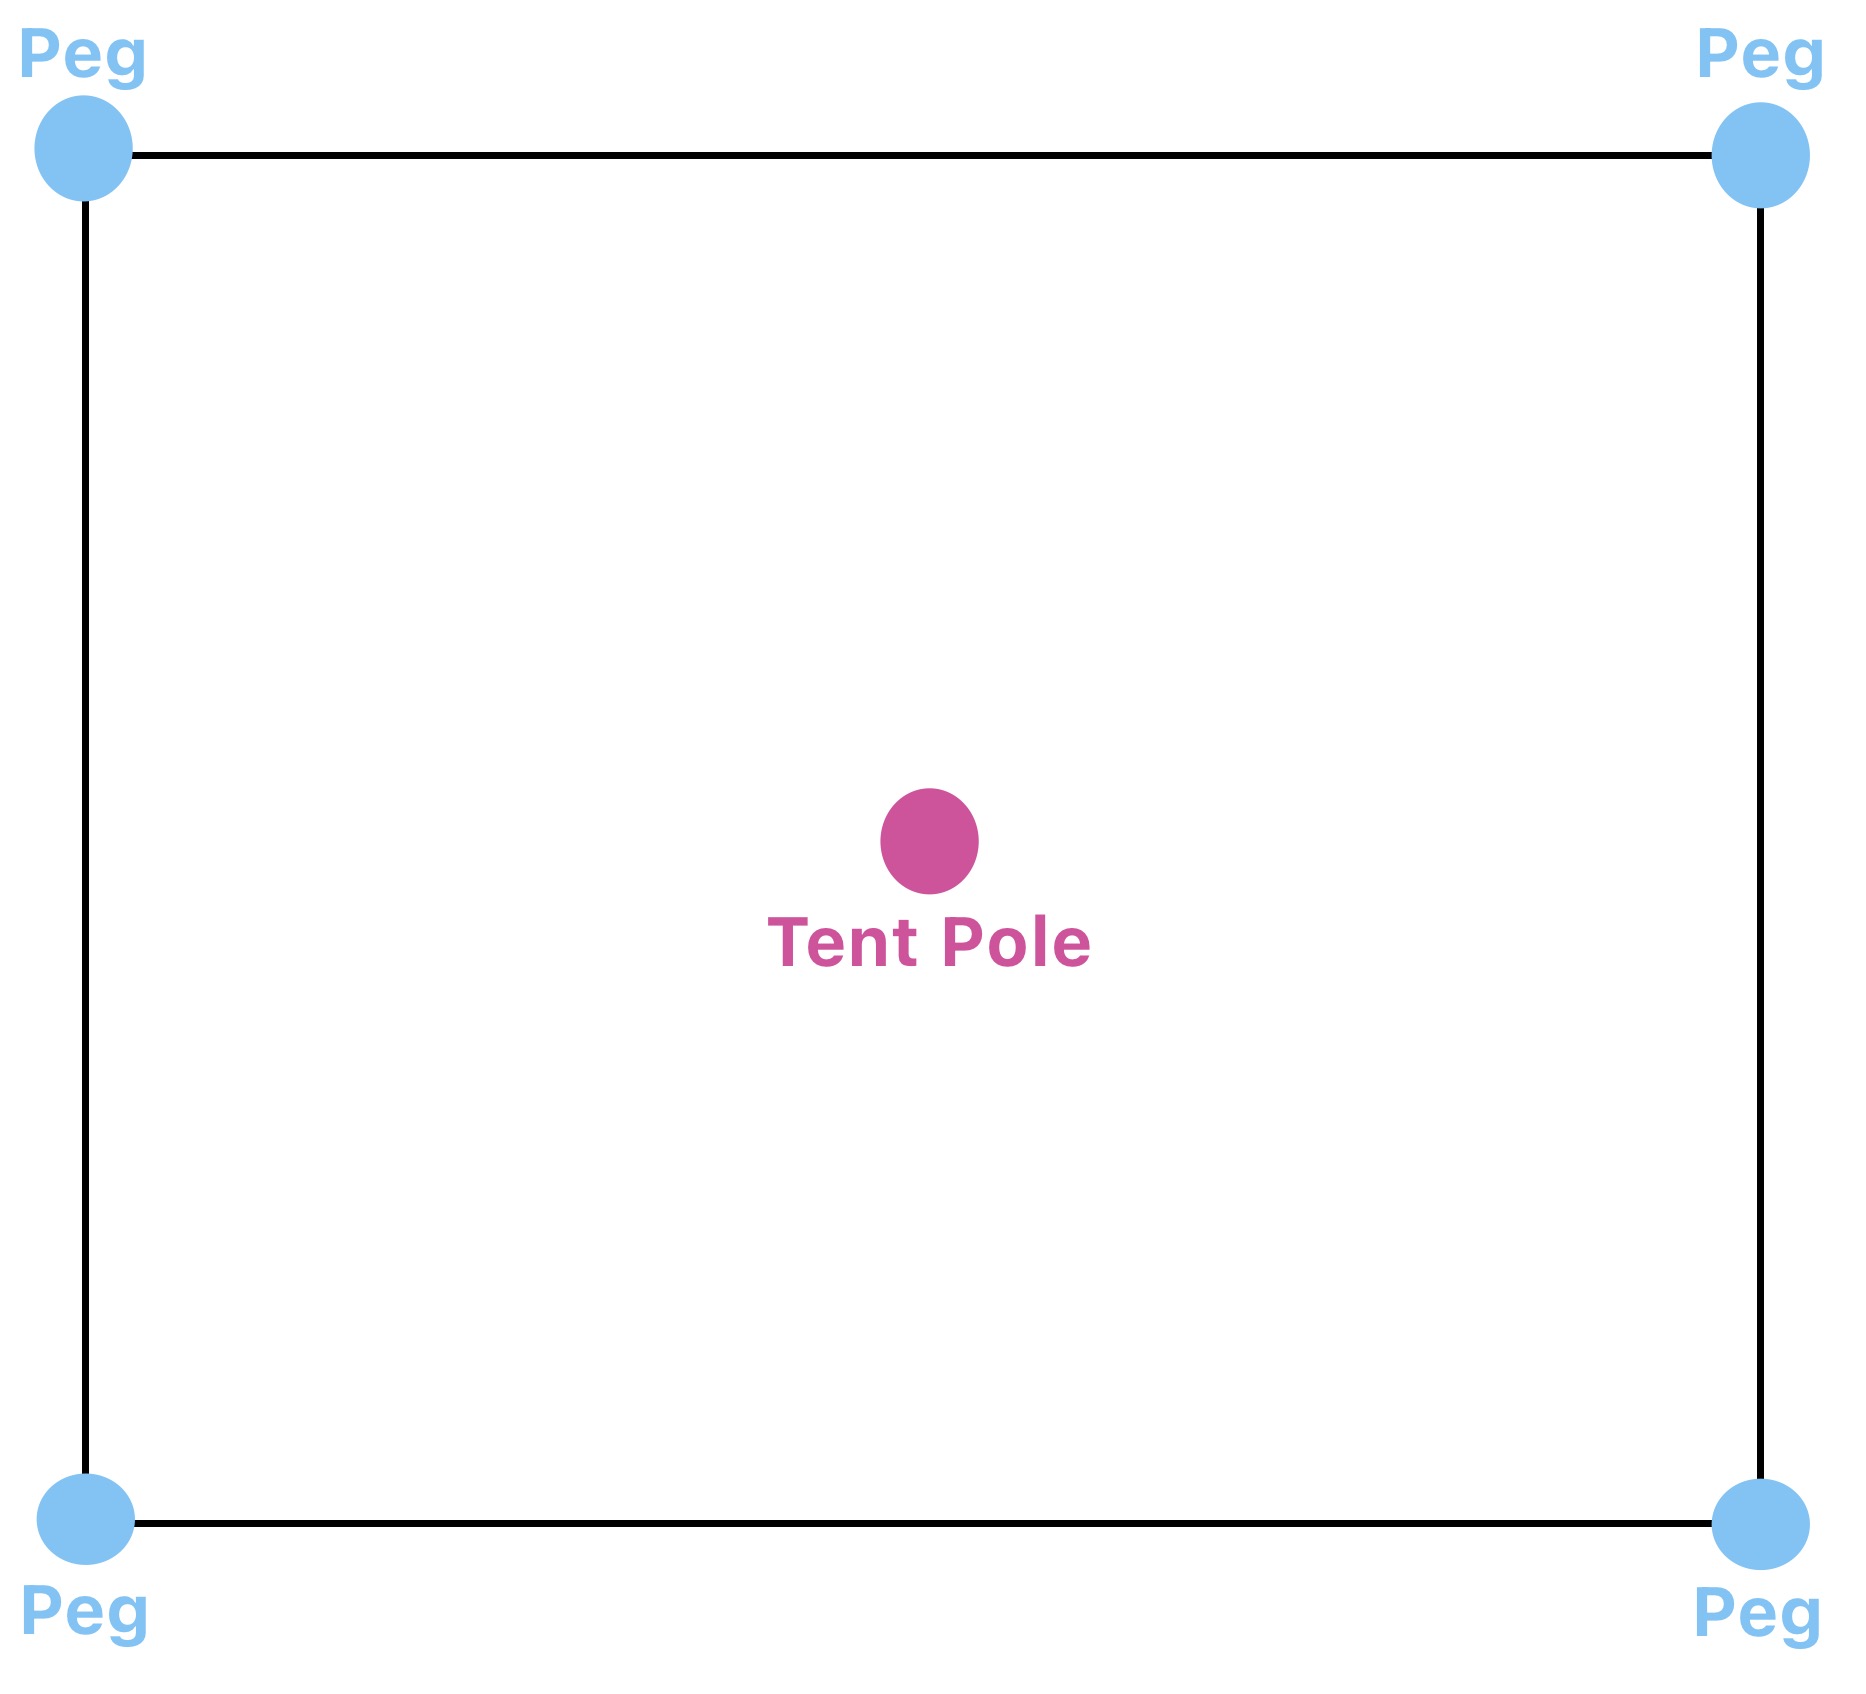
For square shelters, peg down all four corners tightly before setting up the pole.
Two-pole setup for tarps and zelts
So far, we’ve looked at how to pitch a tarp or shelter using a single pole. The same principles apply when using two poles. Don’t try to peg down all four corners first. Start by creating a triangle. Then, peg down two more corners. And after that, set up the second pole on the opposite side to form another triangle.
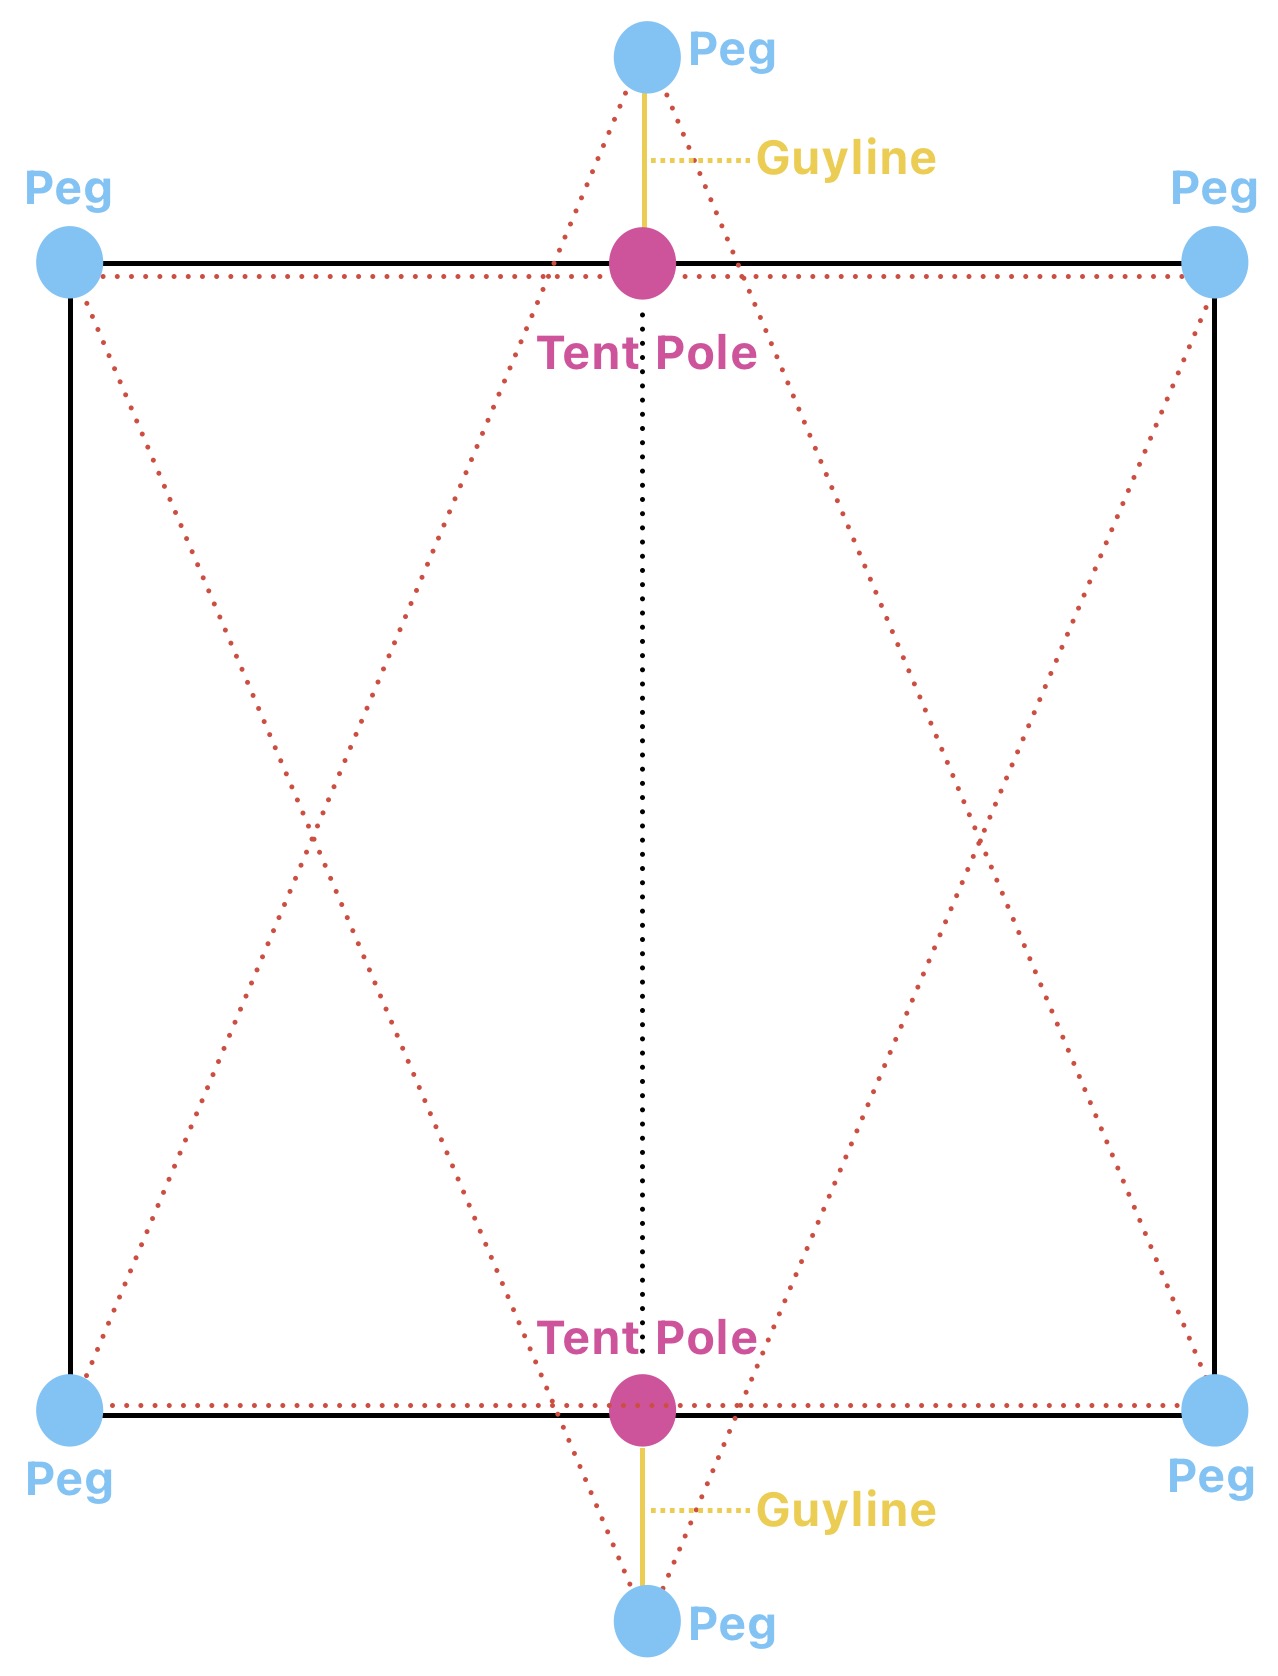
If you want to pitch a tarp in a triangular tent shape using two poles, focus on one triangle first. Then, set up the second pole on the opposite side to form another triangle. This ensures a stable setup. The same approach applies to tarps, bivy shelters, and two-pole shelters.
For bivy shelters or non-freestanding shelters using two poles, the basic setup involves creating two triangles. With a bivy shelter, close the floor first, secure all four corners, and then stand it up. While this process doesn’t require forming two triangles, it helps to understand that the structure is fundamentally a combination of triangles. Knowing this will make it easier to figure out where to apply tension when you’re trying to smooth out wrinkles or get rid of sagging.
Spread the material with the floor closed. Then, peg down all four corners. Make sure the material stays taut.
Stand up a pole on the ground on one end and use a guyline to anchor it to the ground. The triangle that you form with the guyline between the bivy and the ground will keep the pole standing on its own.

Stand up the next pole on the other side, and anchor the guyline from the top of the bivy. Make sure there’s enough tension in the guyline to get the bivy into the right shape. You’re done!
For two-pole shelters from manufacturers in North America and Europe, the poles go inside. For a lightweight zelt (pronounced “tselt”, from the word for tent in German), which uses less fabric, the standard method is to stand the poles outside. You can also skip the poles and attach guylines directly to nearby trees.
When using poles, pulling the guylines upward applies tension both horizontally and vertically, allowing for a clean pitch. The key is to position the poles close enough to the zelt so they provide the proper support. If you’re struggling to pitch a zelt, it’s likely because the poles are too far away. This causes the guylines to pull sideways rather than upward, and results in sagging fabric. Poles function like a house’s pillars. Ideally, they should go inside, but if you put them outside, they should be as close to the zelt as possible.

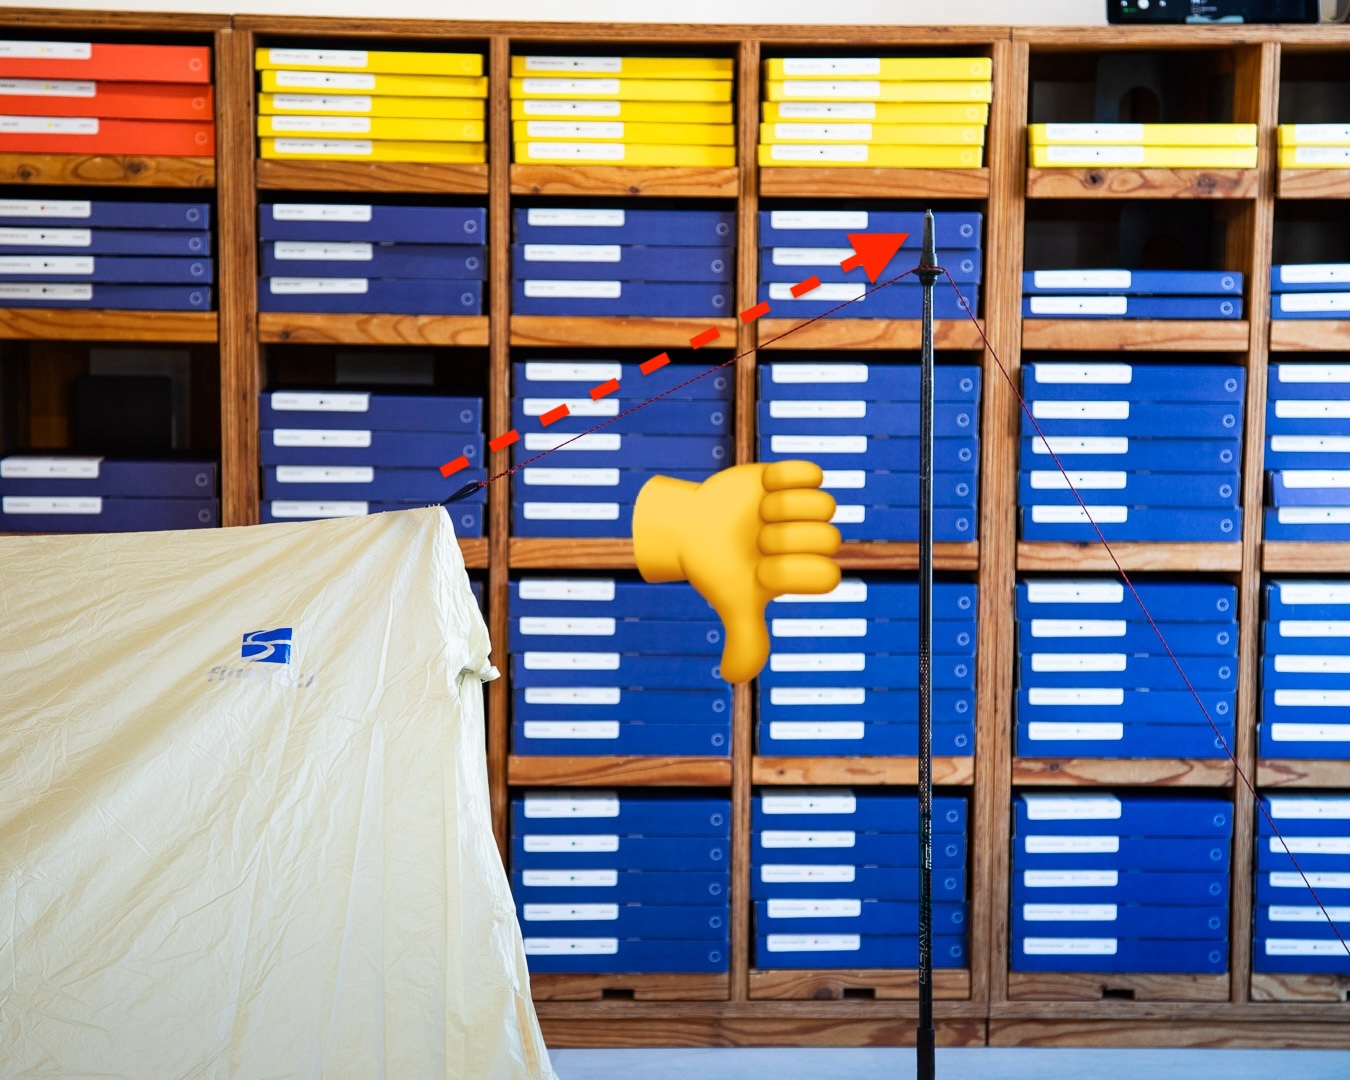
Placing the poles closer to the zelt creates upward tension, resulting in a cleaner pitch. If the poles are too far away, the tension shifts sideways, making it difficult to pitch properly. This is often the source of the problem for people who struggle to set up a zelt.
To improve the wind resistance of a tarp or zelt and ensure that the poles firmly support the structure, you can add an extra guyline to each pole –– so it’s two lines per pole. With a four anchor points securing both poles, you get more stability and better wind-resistance.
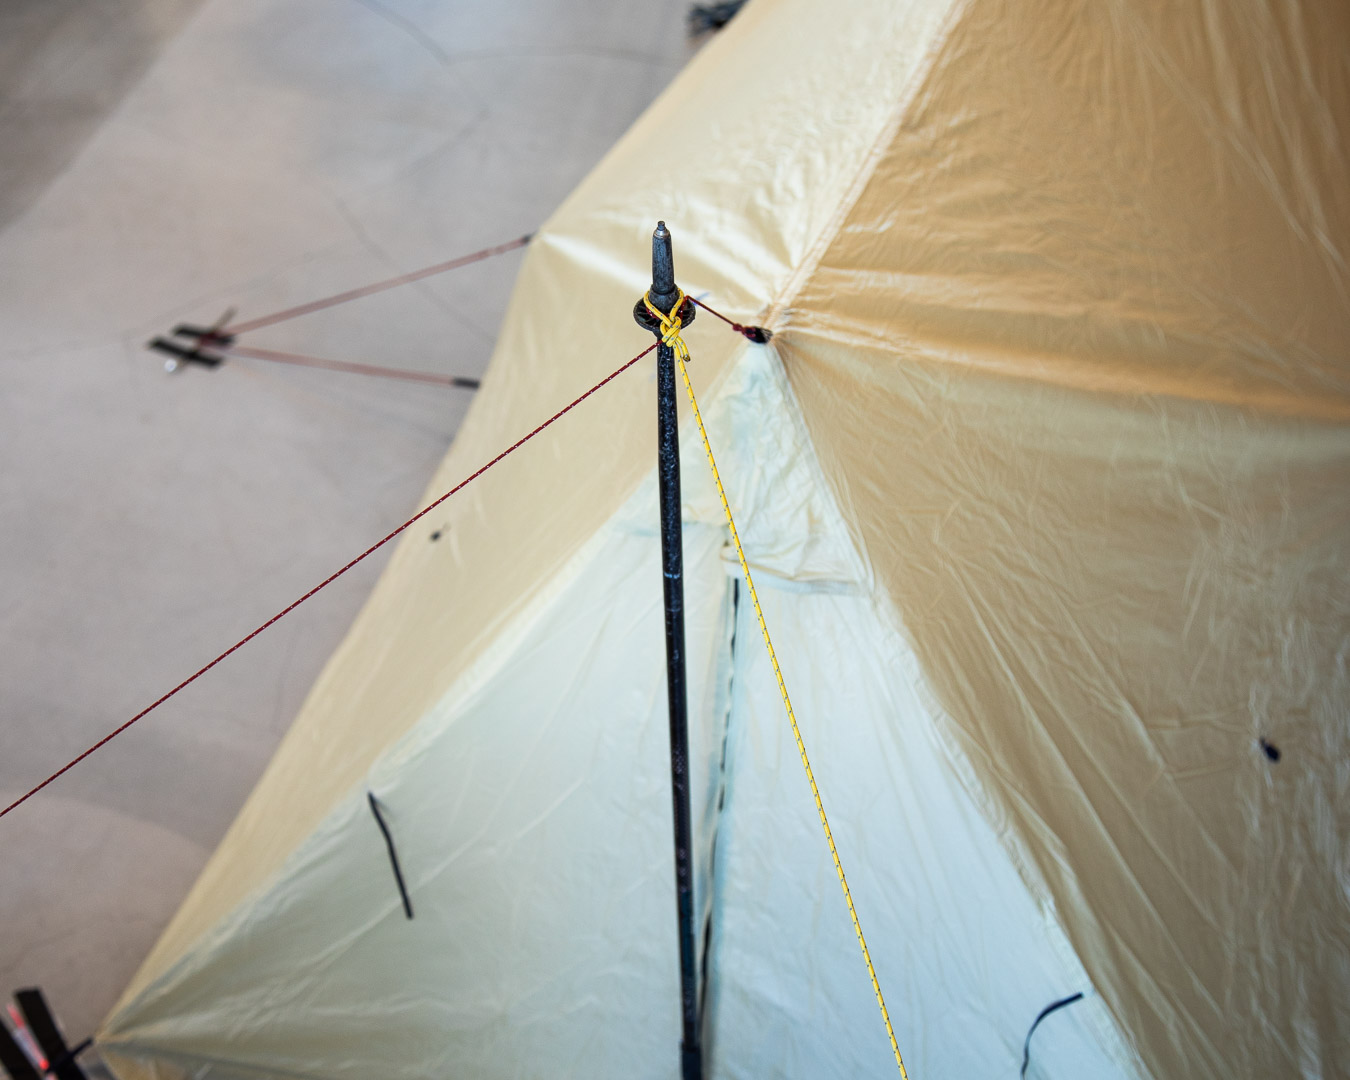
Using two guylines per pole increases the wind-resistance of your setup.
Even if you set up side lifters on a zelt, they aren’t anchored to structural lines, so they won’t hurt wind-resistance. There’s no need to secure them firmly. I personally fix the middle section of the zelt’s floor on the long sides. The more points you secure to the ground, the more stable the zelt becomes. Using side lifters slightly lowers the ceiling height, but it expands the width, improving comfort inside when you’re lying down.
Side lifters do not improve wind resistance even when secured, but pulling them helps anchor the zelt to the ground and enhances livability.
Since a zelt is small, placing the poles inside reduces the space you have for sleeping. However, if you position the poles inside and apply tension from within the ground anchor points, the poles will be more securely fixed. This design was used in models like the Freelight M Trail and the now-discontinued MSR Twin Sisters. Adding extra guylines for additional tension will further enhance stability.
If you want to place the poles inside, you’re better off increasing the size of the tent. The positioning of the poles and the way you allocate living space can significantly affect the inside of a non-freestanding shelter. This is a key difference between non-freestanding and freestanding shelters and tents.
Choosing a tent that will make you want to go hiking
Questions:
——What’s your approach to advising customers who are unsure about which shelter to choose?
I believe that hikers can use whatever gear they like, so I mainly focus on trying to understand what they want from their journey. Many customers who visit Hiker’s Depot and Yamatomichi are more interested in long hikes and travel rather than alpine-style mountaineering. For these customers, it’s clear what kind of tent they need.
Rather than saying, This is the only option for you, I prefer to tell people: “If this is the tent you want to use, let’s figure out how to make it work for you.” I help people learn how to use the gear they want. That’s why I’ve seen plenty of people choosing a tarp as their first tent.
Hiking isn’t necessarily an activity that requires a lot of skill. What matters more is how attuned you are to your natural surroundings, your mindset on the trail, and your willingness to put in the effort. Yes, experience helps. But in the grand scheme of things, I don’t think it matters whether you’re a beginner or a veteran.
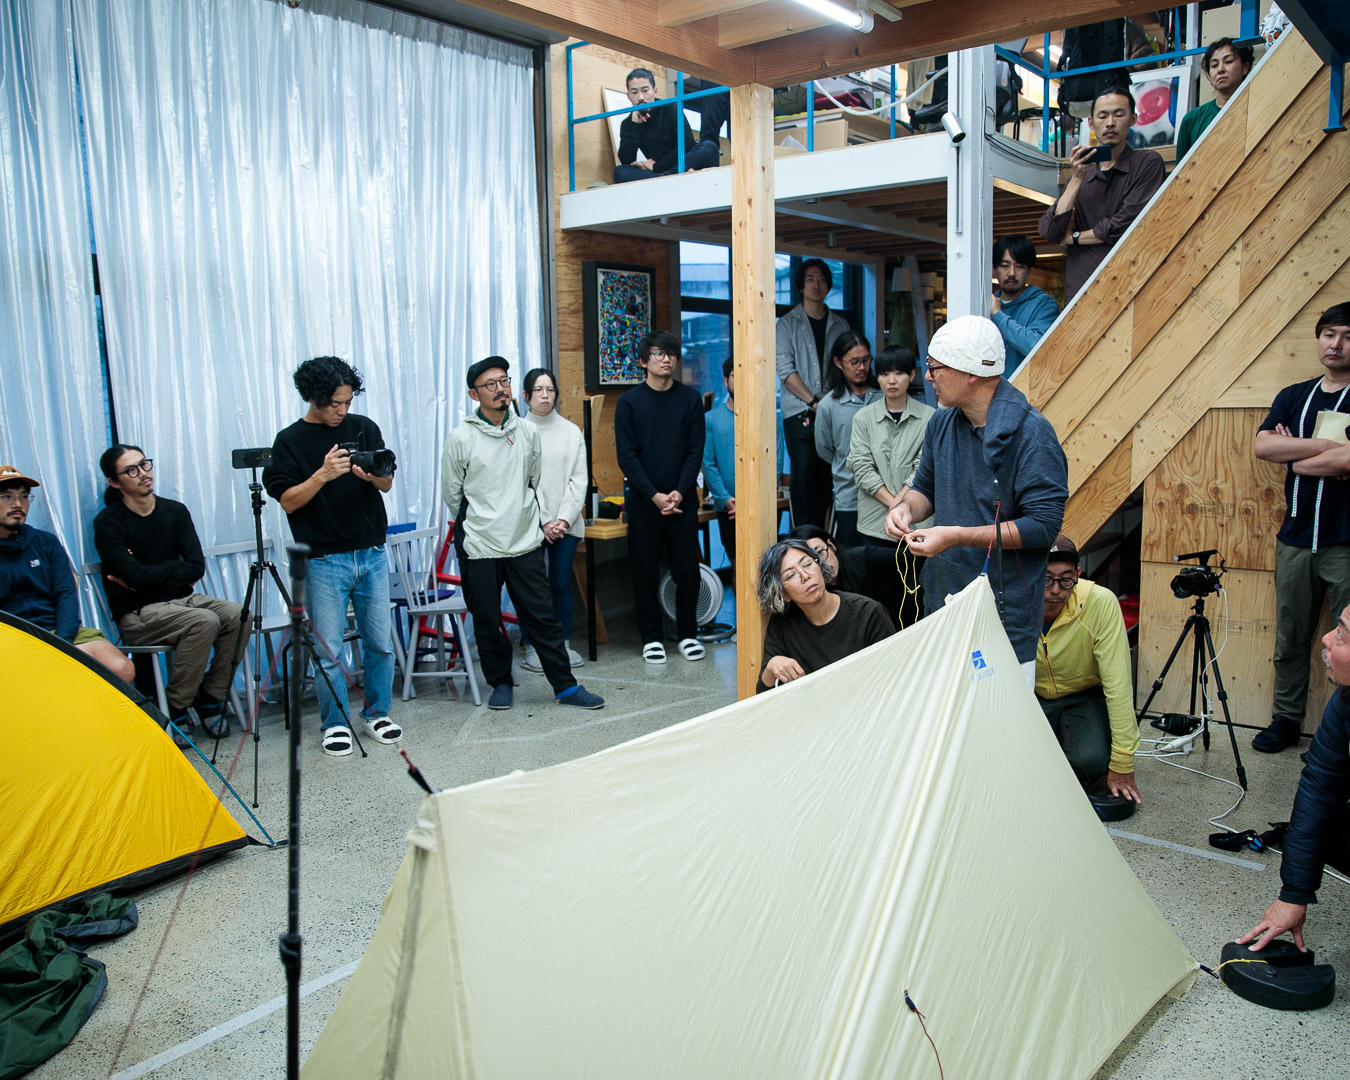
Today’s lecture lasted more than two hours, including breaks.
——How do you advise someone who hasn’t decided between a tarp or a one-pole tent?
I first ask whether they prefer something lightweight or something that’s easy and low-stress to set up. Dome tents generally are less stressful to put up. On the other hand, tarps might cause self-doubt. The key question is whether the person can deal with that self-doubt on the trail. For first-time campers who might feel stressed about using a tarp, I suggest a dome tent. Nowadays, you can find double-wall tents that weigh less than 1kg.
If they want something that weighs less, a bivy shelter works well for many customers who have hiked in the Northern Alps without issues during the non-snowy season. If they go with a tarp, I offer cautionary advice.
Hikers like us tend to admire the outdoor culture in the U.S. We aspire to tackle long trails. There are others who admire alpine climbing –– rock and ice –– and are drawn to European brands. I try to understand their ideal style. In the end, what’s most important is helping them find a tent that gets them excited to go on an adventure.
With activities like climbing or canyoning, you’re venturing off the trail and dealing with a more demanding environment, more technical and physical hurdles. In that case, personal preference might not be your only consideration when choosing equipment. For hiking on trails, I think it’s generally safe to go with gear that fits your personal preferences, as long as you’re attentive to certain things.
Today, I talked about the history of tents, particularly the history of mountain tents, and the basic setup of non-freestanding tents. I didn’t get into the topic of double-wall tents, which aren’t commonly used in ultralight hiking, but I hope I can cover that another time. Thank you.
Series: UL Hiking University